***** IMPORTANT *****
YOU ARE TRYING THIS AT YOUR OWN RISK AND I AM NOT RESPONSIBLE FOR ANY BRICK Wii's OR ANY DAMAGE THAT COULD HAPPEN TO YOUR Wii SYSTEM
OK guys! The guide you have all been waiting for is here! A full-complete guide to get HBC and backup launchers working all in one!! PLEASE READ THE WHOLE GUIDE AND MAKE
SURE YOU UNDERSTAND IT BEFORE YOU PROCEED!!!! We don't want any bricked wiis out there, do we?
This will work on SYSTEM MENU 4.2 VIRGIN and UPDATED. It will work for 4.2e, 4.2u and 4.2j, dunno about 4.2k
There is a new DVD drive chipset that is starting to emerge that will not play DVDR, if your Wii came with sys menu 4.0 or newer on it then it could be one, the chipset is known as a D3-2 and the only way of telling if you have one is to open her up, but as this will invalidate your warranty you are better off trying to load DVDRs and if you just keep getting errors then it is a good indication that you have one. The USB loader will still work though so just follow the guide as normal.
The only extra that you will need is an SD card (I reckon you all have one by now) formatted as FAT32. If you have anything stored on the card, back it up in your PC because you will lose anything, then format it, so it is Guide-ready.
PART A: The astonishing installation of HBC: First steps into modding
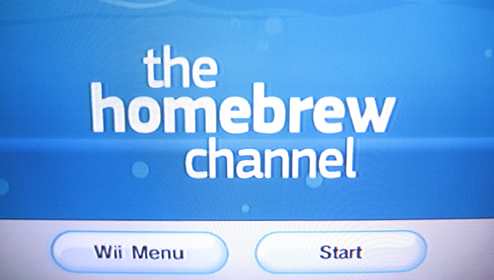
In this part we will install HBC, which is used to run apps from the system menu, using the bannerbomb exploit. Along the way, DVDx will be installed, this allows the lens to recognize burned DVDs (not play backups, just see they are there). In the end we will install Bootmii, which is a very useful app as we will see next.
A1)
http://www.easy-share.com/1909079439/Hack pack 4.2 sys menu 10102009 - 1.rar (Release 10-10-2009)
or
http://www.easy-share.com/1909361287/Hack pack 4.2 sys menu 16012010.rar (Release 01-16-2010)
unrar the contents in the root of your SD card.
In the root of the SD card whould be:
root:\apps
root:\private
root:\wad
IOS38-64-v3610.wad
IOS70-64-v6687 [Patched][FreeTheBug].wad
boot.elf
Hacks.ini
A2)
Run to your wii, place the card in the SD slot and navigate to the SD card icon, bottom left, writes SD and has the same shape, can't really miss it. Once you did this, a warning screen about scams should appear, press ok, screen will go black. A disclaimer shall appear, press one to continue.
(note: following my guide you will never get an upside down HBC. If you ever find the HBC upside down, run this installer again and install HBC again)
A3)
Now three lines should appear:
Homebrew channel, which can be isntalled,
DVDx, also can be installed,
Bootmii, which possibly will give you an error.
Install Homebrew Channel, DVDX. On bootmii option, select "prepare SD card". After it finishes, install it as boot2 (if possible) or as an IOS.
Warning:
Bootmii at most cases will give you an error, so it cannot be installed as a boot2. For most of you will be isntalled as an ios. That is fine.
A4)
After that you are ready, you have installed all of the above! now an app can be palced in the apps folder in your SD card and be run by HBC! This has a load of functions: Media players, Emulators, Useful apps and Homebrew games! browse tham all here, but take care with the ones you dont really understand,as they might ruin your wii! most of them are really safe tho.
Those who were able to install bootmi as boot2 SHOULD BACKUP THEIR NAND RIGHT AWAY!!! If bootmii was installed as ios, then you don't need this step, although you can make one just in case. Mind that you will need a Gamecube controller tho if bootmii was an ios
Here is what you should do (abstract from Dogeggs' guide, hope he doesn't mind )
)
)2. BACK UP YOUR NAND (OPTIONAL)
Making a NAND backup with Bootmii is highly recommended, it will recover your Wii from 99.9% of bricks.
Use the same SD card you used to install Bootmii and make sure there is at least 530mb free on it.
Bootmii is very fussy about what SD cards it uses, so avoid generic ones and try and use a Sandisk or similar.
a) Put the SD card into the Wii, if you installed Bootmii as boot2 then it will load, if it is installed as an IOS go to the Homebrew Channel, press 'home' on your wiimote and select 'Launch Bootmii'.
b) Use the power/reset/eject buttons to navigate the Bootmii menu and select the icon with the gears on it. If those buttons don't work then you will have to use a Gamecube controller.
c) Now select the icon with a green arrow pointing from the chip to the SD card and follow the on screen instructions.
D) In about 10 mins you will have a NAND backup, it is normal to have up to 80 bad blocks so don't worry if you get some.
e) Put the SD card into PC and copy the NAND backup somewhere safe, you can now delete it from your card. If you installed Bootmii as boot2 then also copy the Bootmii folder to your PC and either delete or rename it, otherwise it will load every time you switch your Wii on.
If ever you get bricked then copy the bootmii folder and NAND backup onto your card, do steps a) & b) again, using Preloader to get to HBC if necessary, then select the icon with the arrow going from the SD card to the chip. It is not recommended to restore your NAND if you have Bootmii installed as an IOS.
The following should get you a cios, so that you can play backups on your wii:
>>Those who had previously (before the update) installedios249 may have a chance to play backed up games easily. They should run cios38rev14 installer from Homebrew Channel and useios250. if that does not work, try running it again, but using one of the following : ios202, ios222,ios223,ios249.Then you can proceed to D. If one of these does not work either, you should have to do the following:
PART B: The extermination of the evil stub ios249
Ok, so in this update and those ppl knew that we use ios249 to install our cios and place our backups. What did they do? they invented an empty ios ("stub") and place it in slot 249, to stop us. Like they will! Muhahahaha. Here is what we do about it. We will uninstall ios249 stub, and then install our own cios38rev14 in slot 249:
B1)
or
or
(pick start with the first one, if you get an error pick the next one and follow instructions from B2 and on again. One of this will do the trick without an error.)
B2)
Format the SD card, with FAT32, place the contents of the included folder in the SD card root.
Only files in SD root should be:
root:\Wad\
root:\bootmii\
root:\startup.elf
root:\boot.dol
root:\00000001\ <-(if available)
B3)
Place the SD card in the wii, start HBC and press home ar the main HBC screen. (If your wii boots to Bootmii, just go to B5)
B4)
Select bootmii and wait.
B5)
Wadmanager should start.
(On ios select, select ios36, or try a few, 249, 250 dunno,we are scratching our heads with this)!!
B6)
Select SD card and press A to continue.
B7)
Select ios249 from wad folder and press A
B8)
change the action to "uninstall wad", press A
B9)
Done!! now to the next step!!
PART C: The installation of our beloved cios38rev14
Now that we deleted the stupid stub, the place is free so thet we can isntall cios!
C1)
or
C2)
Format the card with FAT32, download the file above and place the contents of the "Place to SD 2" folder in the SD card.
It should only contain the included files:
root:\ios38-64-v3610.wad
root:\bootmii\
root:\startup.elf
root:\boot.dol
root:\00000001\ <-(if available)
C3)
Place the SD card in the wii, start HBC and press home ar the main HBC screen.
(If your wii boots to Bootmii, just go to C5)
C4)
Select bootmii and wait.
C5)
cios38rev14 installer should run and give you some options.
C6)
At the beginning you should see ios249 highlighted. Keep pressing left on the wii pad until you see "Do not reload IOS" at the ios select screen, press A.
(for some reason that neither I nor the other follows here seem to understand, this does not work for everyone. If this fails, try again using 249, 250, 222, 223, 36, 37... and others. Switching to one of these may work for you. be sure to restart your wii after each attempt)
C7)
If you have internet connection, select "Network install", else select "SD card", Press A.
C8)
Proceed with the installation, and you are done.
You should have ios249rev14 isntalled, which will allow you to run any Backup loader or USB laoder!
PART D: Getting the backup launchers to work : the optionals
Now we are worked up and ready to run our backups!! REMEMBER: Use Verbatim DVD-r burned at 2x-4x to minimise errors!
D1)
Remember the first pack I gave you? Place the "apps" and "wad" folder of that in the root of the SD card
(The first rar ok? delete all the others from SD)
D2)
Place the SD in wii and boot up, go to HBC.
D3)
Now:
-For DVD launching, go to NeoGamma r7
(if you get a black screen on this one, you have not done B or C correctly. Try running them again)
If you get errors 1101, 1048 or 1053 AND you are certain the media you are using are the correct ones (DVD-r Veratim at 4x) you most probably have the new D3-2 drive that does not read backups, and you should use a USB device.
IF YOU RUN NEOGAMMA AND IT SAYS AT THE BOTTOM "cIOS249rev14" THEN EVERYTHING IS CORRECT.
-For USB launching, go to USB loader GX
Ok seems that a lot of noobs ask me about a black screen at usb loader GX. This may occur in some cases:
1)ARE YOU SURE YOU DID THE ABOVE CORRECTLY? If neither neogamma nor usb loader launch correctly, then steps B adn C were not done.
2)ARE YOU SURE YOUR HDD IS COMPATIBLE WITH WII? Check this here
3)ARE YOU SURE YOU ARE USING THE CORRECT USB PORT? The correct one i the one at the side of the SD card adapter, the outer one, not the inner one.
4)ARE YOU SURE YOU FORMATTED THE HDD WITH WBFS MANAGER?Here it is
5)ARE YOU SURE YOU PARTITIONED THE DRIVE CORRECTLY? If you have more than one partitions, make sure the WBFS one is the first in row, primary and active.
D4)
Install wads (careful with that, ok? you are not priiloader safe. Definately do not uninstall ANY IOS LOWER THAN 200!!! You will brick! I repeat for the Butt-heads:Do not uninstall ioses with a number lower than 200!!!)
To install wads, select wadmanager, and choose ios249 and SD card on the options (should be default).
-If you want Neogamma as a channel , install Neogammar8.wad
-If you want USB loader GX as a channel, install USBLoaderGXr850.wad
(this will install the full channel, but you can install the forwarder instead, USB Loader GX-UNEO_Forwarder.wad, which can be directly updated by placing updated version in the SD card, yet you will need the SD card constantly inside the Wii slot to launch it. Install whichever sounds more useful to you)
Note that your HDD needs to be formatted as WBFS with WBFS Manager.
D5)
You can now install ios202, ios222, ios223. From HBC, run cios222 installer and select ios249 to use. At the next screen, choose the following, one at each turn:
-ios202, for usb - using ios38 (needed for USB2.0 support at Media Players)
-ios222, for uloader - using ios38 (needed for USB support of instruments and stuff)
-ios223 mainly for GH5 - using ios38 merged with 37 (same as above)
Mind that you will need an internet connection for this!!
You can also install the ioses using any other combination you like, But those are recommended for now, until a games needs otherwise. If a game does not run with USB loader, try changing the ios it uses through settings menu to one of the above.
Video Part 3
Video Part 4
Thanks To
www.wiihacks.com
www.wiihacks.com
1 comments:
thank you so much for your guide, but i have come into a littel trouble. i try to uninstall 249, but when i try ios36 and a couple it just come up as an error. and when i try 249 and a couple it just makes my wii go to sleep. any help would be greatly appreciated. thank you so much.
Post a Comment